
VOICE Home Page: http://www.os2voice.org
Newsletter Index
< Previous Page | Next Page >
Feature Index
|
VOICE Home Page: http://www.os2voice.org |
February 2004
Newsletter Index
|
| By Wolfgang Draxler © February 2004, Translation: Christian Hennecke |
I am very interested in databases. However, there is only a relatively small amount of OS/2-related information available. Hence I started to collect and put together this information with the help of Thomas Klein. The result is my first article for VOICE.
I am going to split the article into separate parts, so it won't get too long. The aim is to explain the connection of REXX to MySQL. The first parts will deal with the installation and customization of MySQL, then I will talk about the REXX driver, and finally about database programming with REXX. As far as REXX programming is concerned, please read the series by Thomas Klein too. I will try to use commands and functions that have been dealt with in that series exclusively.
MySQL is a client/server database; i.e. database administration and applications run separately. The application (i.e., the client; e.g., the "Console" program) talks to MySQL (i.e., the server) via TCP/IP. MySQL uses port 3306. Thus, server and client can run on different machines.
MySQL understands SQL (Structured Query Language) and also has some own extensions built in. More about that later. First of all, we will deal with installation.
Complete basic information and good documentation as well is available at the following sites:
MySQL home page: http://www.mysql.com/
Yahoo discussion group: http://groups.yahoo.com/group/mysql2/
If you visit a bookstore, you will find many books on MySQL. Most are intended for Windows and Linux, but the database functionality is the same and they can be used for OS/2. However, be sure the versions match.
Unfortunately, there are very few printed media for OS/2. Things look better on the Internet, e.g. at http://www.netlabs.org/mysql/ and a quite good web page by Yuri Dario at http://os2power.dnsalias.com/yuri/mysql2/index.html.
On that page, you can also obtain the current OS/2 version 3.23.50 build 1 as a WarpIN package. Version 4 is being worked upon at the moment. It hasn't been finished yet, though, and is not available for download.
Once you have downloaded the file mysql-3-23-50-b1.wpi (approximately 2MB in size), you should also get the documentation package mysql-3-23-50-pdf.wpi. Installation using WarpIN is quite easy. Run it by double-clicking on the WarpIN package mysql-3-23-50-b1.wpi.

Please press "Next".
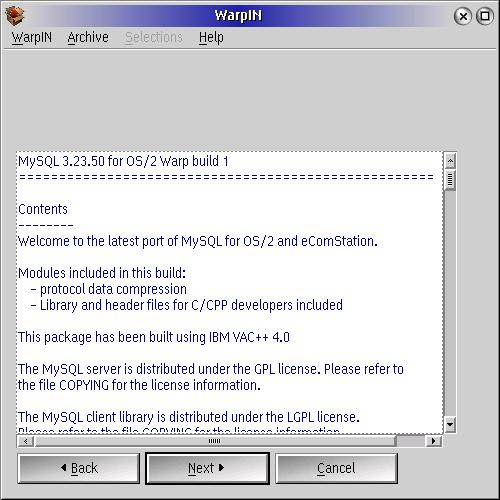
Once you have read the complete text, press "Next" again.

You should also read the above text thoroughly, and if you agree, press "I agree".
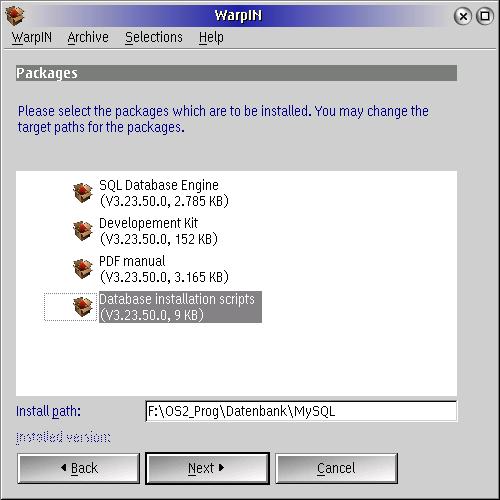
Now enter the installation path. If you haven't installed the database before, select the "Database installation scripts" package too. This will start the installation script.
Press "Next".
If you have chosen a new directory for installation, the following dialog is displayed:
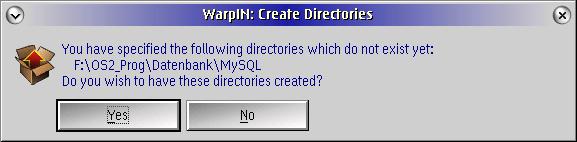
Confirm by pressing "Yes".
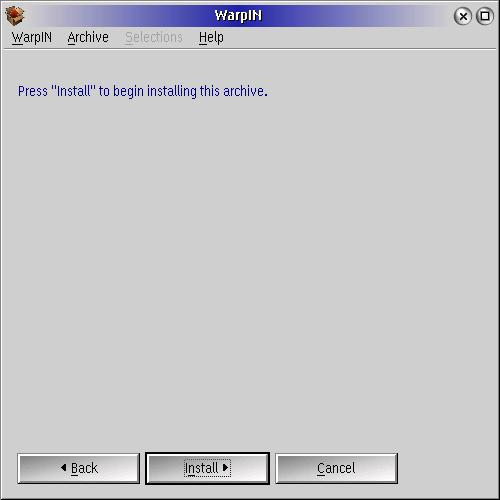
Now click "Install".
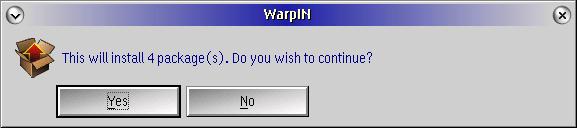
Prior to installation, no further dialog will be displayed. Press "Yes".
After installation, a message will be displayed that the installation was successful.
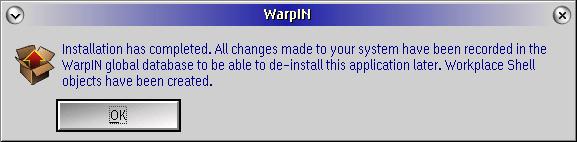
Close that message by pressing "OK".
Note: As already noted, MySQL uses TCP/IP (port 3306 by default). Hence you need to adapt your machine's, or machines', firewall accordingly.
On the WPS, you will find a new folder object called "mysql 3.25.50". This folder contains the following objects:
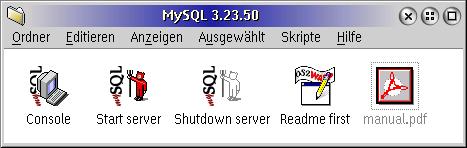
Console: You will probably use this textmode-based program most, as it offers a relatively simply interface to MySQL.
Start server: This object starts the database server. Essentially, it only runs the program "<installationpath>\BIN\MYSQLD.EXE". You can copy this object to the "Startup" folder, of course. This will activate the database server on system startup immediately.
Shutdown server: This shuts down the database server and terminates all open connections to MySQL. Be aware that there still could be clients with an open connection to the server. These programs will get an error message when calling the MySQL APIs. Reaction to that differs. It is best to first close all clients and then shut down the server.
Readme first: You should read this file in any case.
manual.pdf: contains all kinds of information (functions, parameters, etc.) about the database.
Now start the server using the "Start server" object. The following window should be displayed:
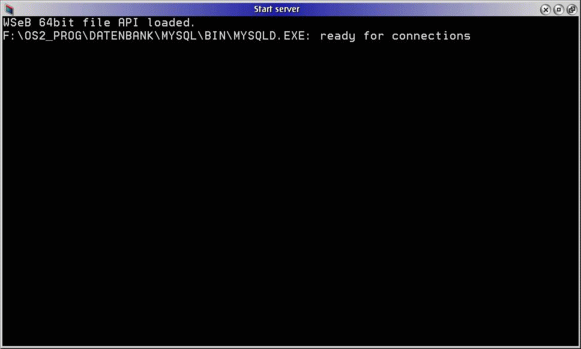
The server is active and ready for operation now.
I would like to point out that the database server is very insecure in terms of access at this point, because the root user doesn't have a password, and if you have a permanent internet connection, it is visible from outside. You should therefore setup your firewall accordingly. Information about adapting the root password can be found at the end of the article.
Before we start applying changes, let's see, if the database server really works. This is done best with the "Console" object. Double-click the object and you should be presented with the following window:
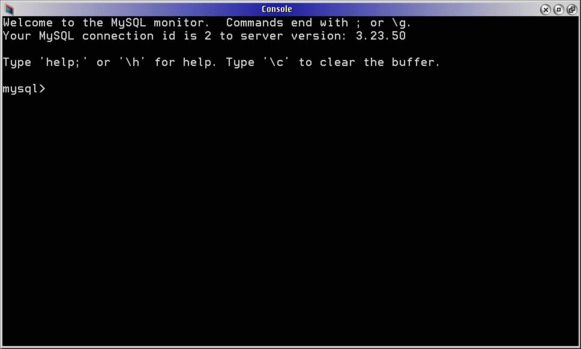
As the text states, help can be invoked via the "help" and "\h" commands. That help only deals with the Console's commands, not those of the database server.
Note: You can also run the program from an OS/2 or eCS window. It resides in "<installationpath>\BIN\MYSQL.EXE". As is the case with all MySQL progams, you can have a short help message displayed by using the "-h" parameter. As that message is quite long actually, you should always add "| more". This will display the help page by page.
Inside the Console, you can now enter commands. For a start, try "show databases;".
You will get the following result:
mysql> show databases;
+----------+
| Database |
+----------+
| mysql    |
| test     |
+----------+
2 rows in set (0.02 sec)
As you can see, this command displays the database names. The databases displayed above have been created by the installation routine.
The "mysql" database is very important, because it is required by the database server. Never delete or rename this database.
You may have noticed the semicolon behind the command. This is important. It tells the Console that the entered command is complete and has to be sent to the databases. That is to say you can enter commands spanning multiple lines.
Try the following: Type "Show" and press the <Enter> key. A new "->" command prompt will be displayed in the next line. Type "Databases" and press the <Enter> key again. As before, a new "->" command prompt is displayed. There, type " <Enter> again. As a result, you will get the list of databases again:
mysql> show
-> databases
-> ;
+----------+
| Database |
+----------+
| mysql    |
| test     |
+----------+
2 rows in set (0.01 sec)
To quit the Console, type "\q" followed by the <Enter> key.
Before finishing this article, I will keep my promise regarding the administrator password.
In MySQL (under OS/2), the administrator is called "root" user.
In the database's BIN subdirectory, you can find the "mysqladmin" program. (This is the "F:\os2_prog\datenbank\mysql\bin" subdirectory here.)
It is best to open an OS/2 or eCS window and change to the database directory using "cd" (i.e., to "F:\os2_prog\datenbank\mysql\bin" in my case). Now type the following command (instead of "pw", you have to enter your own password, of course):
[F:\os2_prog\datenbank\mysql\bin]mysqladmin password pw
From now on, the root user has the new password "pw".
When you start Console again, you will probably get the error message "ERROR 1045: Access denied for user: 'root@localhost' (Using password: NO)". The reason is that the Console uses the root user, but does not ask for a password. This can be adapted relatively easily:
Open the MySQL WPS folder. In the "Console" object's properties, change the content of the entry field "Parameter" by entering "-p". Close the properties and start the Console. Now, the message "Enter password" is displayed. There, enter the password you chose before ("pw" in our example). Then you should be presented with the normal MySQL prompt again. As noted above, you can terminate the Console by entering "\q".
And now my first article comes to an end. In the next part, I will explain how to create several users in MySQL and how to configure the database according to your requirements.
References:
|
Feature Index
editor@os2voice.org
< Previous Page | Newsletter Index | Next Page >
VOICE Home Page: http://www.os2voice.org